
Create and Schedule a Report
Create and schedule a report
Schedule Reports is a feature that lets you set up automatic delivery of analytics reports by email, SMS, Slack, or Microsoft Teams to yourself and stakeholders. You can choose which reports to include, set a delivery frequency, and customise the report format.
Create a new report
- In IC Analytics, go to Administration > Personal > Schedule reports.
- On the Scheduled Reports page, you can create new or edit and delete existing reports.
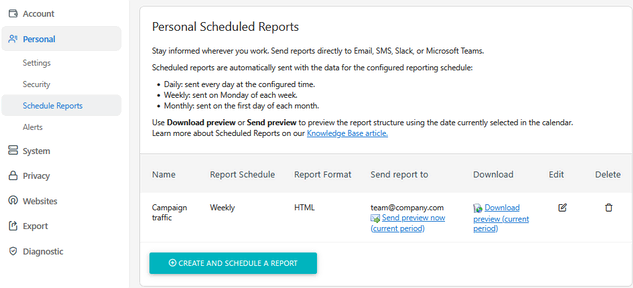
- To create a new scheduled report, click Create and Schedule a report.
- Provide the schedule details about where and how the report should be sent.
- Choose what visits are included in the report. By default, Choose a segment is set to All visits.
- Select the delivery method and format options such as PDF or CSV.
- Define the Display options and then save the new report.
Configure Display options
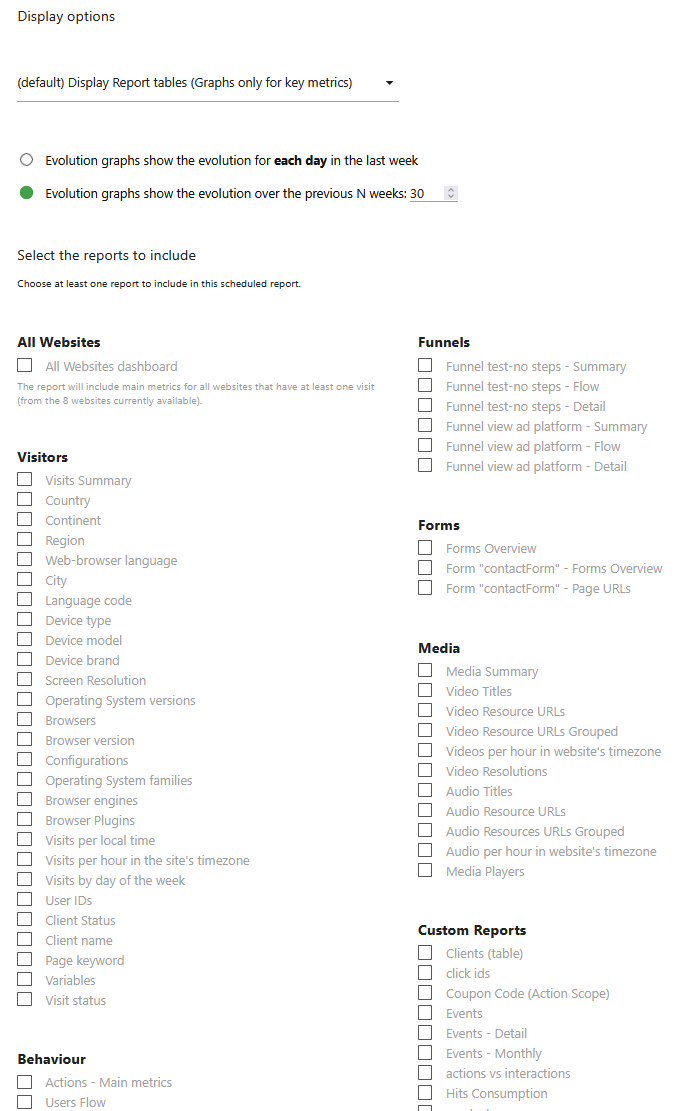
Choose the following display options for the scheduled report:
- report tables for all reports and graphs only for key metrics (default)
- graphs only (no report tables)
- display report tables and graphs for all reports
- display report tables only (no graphs)
Notes:
- when you choose to include graphs in all reports, you can select the option, Show Historical Graphs for the top 5 values to get a historical graph displayed for each report.
- when evolution graphs are displayed within the report you can also choose whether the graphs show each day within the report's selected period, or whether to show the evolution over the last periods (for example, the last N weeks for a weekly email report or the last N months for a monthly email report).
In the last section, select the metrics and reports to be included in the scheduled report. You can choose multiple metrics and reports:
If you make changes to an existing report, click Update Report.
Still stuck? Open a support ticket.